Why & How you Must have Custom AMP template for your Ghost blog
AMP aka Accelerated Mobile Pages is a product of Google created to give better web experience on mobile. It's all about serving lightning fast web pages on mobile. If you see ⚡ symbol left to the URL of the Google search result, that site is optimized to serve AMP. Most of the AMP are served from Google’s AMP cache.
Even Ghost tells that having AMP enabled for your blog will put it in Google's good books. So, it's recommended to have it enabled. If you have already enabled it, you can access the AMP version of your posts by appending the post URL with /amp.
Note: Only your post pages will have AMP versions, as those have more chances of coming in search results unlike your home page.
Benefits of AMP
- As mentioned before, speed of loading.
- Possibility to feature on Google cards.
- To some extent, your search rankings can improve.
- You can also offer ads with the benefits of AMP using custom AMP components like amp-ad or amp-auto-ads.
You may like - Self-hosted Ghost blog setup and configuration
What Ghost offers
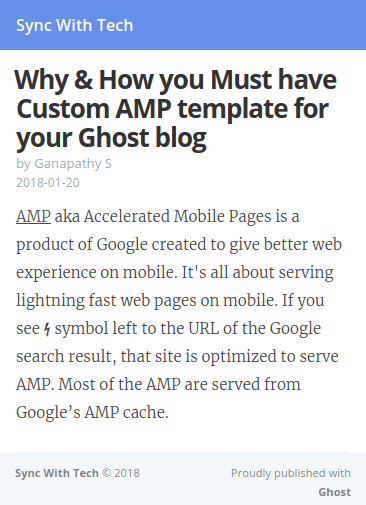
If you have enabled AMP, you might not know it before, your mobile pages will look something like below, when it is served by Google to search users on mobile. You can quickly do a Google search and check it yourself.

As this is the best Ghost can offer by default, you don't get much. The downsides of this default template are, you're not tracking the pageviews, users don't know where the comments are and there's no social share buttons.
You can customize this as you wish, not only for better look of the page, but also for several other benefits. To change the template of the AMP of your blog, you can simply add your own amp.hbs file to your theme directory.
I have done it for this blog (Check below image). You can also check it by loading this page after appending /amp at the end of th URL. The best thing is anybody can reuse that template with minimum changes. You can find the source on GitHub.

Perks of this custom template
- You can easily add Google Analytics page tracking by adding your GA tracking ID.
- You get social share buttons for the post.
- You get to display your logo.
- Display read time & last updated time of your post.
- Tags of the post will be displayed.
- Links to social media pages of your blog.
How to install
- Navigate to Design section of your Ghost admin panel.
- Download the theme to which you want to add custom AMP. A
.zipfile will be downloaded. - Unzip the zip file.
- Download the source file mentioned above or copy paste the code to file
amp.hbs. - Add your Google Analytics ID in line #158, replace the social media page links with yours and edit the author description.
- Move the file to the theme directory.
- Zip the theme directory and upload it to the Design section on Ghost admin panel.
Note: If you don't use Disqus for comments, remove the HTML tag for the comments or alter it in the source before adding it to your theme.
Once everything is done, make sure to check the AMP version of any one of the posts.
You may also like - How to Setup Automatic Backup for your Ghost Blog.
I have built an app to check the things that matter to you the most with a single click. If this interests you, you can give it a try on getradar.co.
