
How to Use Photopea to Change Image Dimensions Online
At some point, you may have to do some image editing like cropping, rotating or resizing. Photopea is an advanced online image editor with many features. Instead of installing an image editor on your desktop just for simple tasks, you can use Photopea which runs on your browser. The best part is it doesn't upload your image anywhere, nothing leaves your browser.
Many times, when your image doesn't meet the dimension requirements, the site doesn't allow you to upload the image. Sometimes you are allowed to upload it. Either way, you won't be able to upload your image or even if you are able to do, it doesn't look good on the site because of unmet dimensions.
To rectify this, you have to change the dimensions of your image, in other words, you've to resize your image. Read - guidelines to resize images.
To explain better, let's take the above Cartoon network logo (.png) and we're going to resize it to 320 x 132 pixels using Photopea. There're 5 steps in this process.
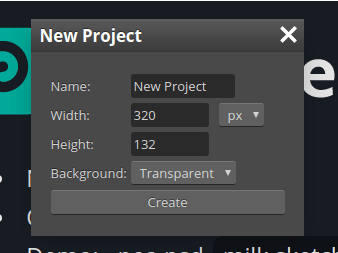
1. Create a Transparent Layer
The very first step is to create a transparent layer with required dimensions. Open Photopea, select File → New, or press Ctrl + N. In our example, width is 320, height 132, select transparency as background. Click on create. This layer will serve as a background to our image.
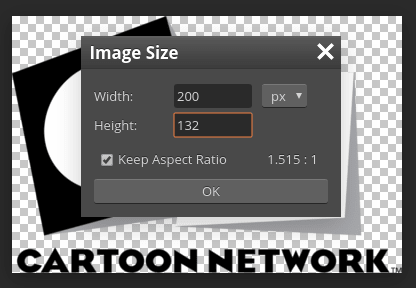
2. Open your Image and Resize
Now, open your image, File → Open or press Ctrl + O. Your image opens in a new tab. To resize the image, select Image → Image Size. As explained in the image resizing guide, determine if you have to go with the height or width. Our example has to go with the height, so check Keep Aspect Ratio, input 132 in the height textbox and press Enter.
The other parameter will change automatically. Here, the width will change to 200. Now, click OK. You've resized your image successfully.
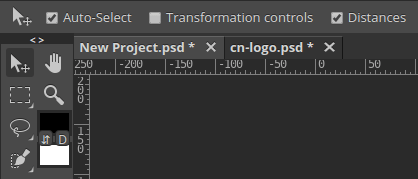
3. Copy and paste your Image on Transparent Layer
Select the whole image by pressing Ctrl + A or select Select → All. After selecting, copy the image, press Ctrl + C or select Edit → Copy. Switch the tab to transparent layer and paste your image by pressing Ctrl + V or select Edit → Paste. After pasting, your transparent layer looks like,
4. Align the Image horizontally center and vertically middle
Your image is on extreme left on the transparent layer. To center-align, select Move tool from the sidebar and check distances on the top toolbar.
Now the transparent layer looks like the one below. It has grids with numeric values in pixels which makes it easy for you to center align. Here, there is transparent 120px free space right to the image.
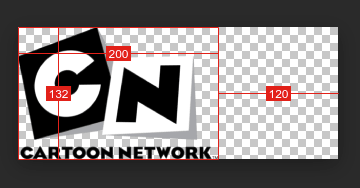
You can leave 60px on both right and left side of the image to center-align it as the image occupies the whole height 132px. Just click on the image and drag it to the right till it becomes 60px on both sides.

You may have to move the image up or down, based on the aspect ratio of your image.
5. Save the image
You must be ready to export the image. Select File → Export as → PNG. If you select JPG, the background becomes black, so select PNG or GIF. Now, choose the quality you want and click on Save. Your saved image,
Your image has achieved required dimensions and it will look good after uploading.
I have built an app to check the things that matter to you the most with a single click. If this interests you, you can give it a try on getradar.co.